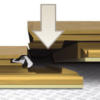
Method: Drop down
Click the panel in the long side, slide your floorboard towards each other on the short side and press down.
Our timber ranges feature the patented Uniclic® joining system for fast, trouble-free installation.
In this step-by-step instruction video you’ll learn how to install Quick-Step ‘Parquet’ flooring from start to finish.

Click the panel in the long side, slide your floorboard towards each other on the short side and press down.
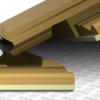
Click the panels first on the short side and click the long sides together.
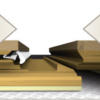
In contrast to many other brands, Quick-Step timber floors can also be inserted horizontally. This is very important when installing the last row of planks, or in places where it is difficult or even impossible to rotate planks into position (under door frames, for example).

Thanks to our attention to detail in manufacturing, Quick-Step Timber can also be directly adhered to a well prepared sub floor. Whilst direct sticking wood flooring has some advantages (reduction of foot sound), there are also disadvantages that need to be considered. Talk to your local dealer for advice on your project.
In this step-by-step instruction video you’ll learn how to glue down and finish your Quick-Step Timber flooring from start to finish.
Unlike many other floorcoverings, Quick-Step Timber can be installed over heated concrete subfloors*, providing the following three conditions are met:
TIP: For best results, installation should be carried out with the heating system turned off. 24 hours after completion of the installation, the heating system should be turned on and the temperature increased gradually over a 7 day period until the normal operating temperature has been reached.
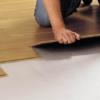
Unlike many other floorcovering options, Quick-Step Timber can be installed over moist subfloors.
As Quick-Step Timber is a floating floor and therefore not directly adhered to the subfloor, simply installing black plastic sheeting underneath the foam underlay or Combi-Lay underlay, will protect your floor from rising subfloor moisture. Floorscape recommend the use of plastic sheeting or Combi-Lay underlay under all installations. Here are some tips to installing your plastic sheeting.
We recommend the use of plastic sheeting that is at least 200uM thick. This will be available from your local Readyflor Retailer.
After selecting your board direction and undercutting your door frames, roll out your first row of plastic sheeting along your starting wall. The plastic sheeting should then be trimmed using a sharp “Stanley” type knife, making sure you allow the sheeting to cover the entire floor area and run up the walls and vertical fixtures 100mm (the excess will be trimmed off after you have installed your floor). Now roll out your foam underlay and begin installing boards. When it comes time to roll out your next row of plastic sheeting, remember to overlap all joins by 300mm and tape each join well using a vapour-tight tape like duct tape.
For concrete or timber floors in older buildings that are not knowingly or logically wet or moist, the alternative to using plastic sheeting then foam underlay is to purchase Premium Combi-Lay Foam Underlay. Available in either Standard or Quiet Step qualities, Combi-Lay combines both foam underlay and plastic in the one layer. If there is any doubt as to the moisture content of a subfloor, carry out appropriate moisture tests prior to installation.
Alternatively you could use Premium Combi-Lay Underlay. Combi-Lay, available in either Standard or Quiet Step qualities incorporates both foam and plastic in the one layer. It even has a built in overlap and tape for your convenience. Details on Combi-Lay can be found in the Accessories Section of this Website.
While many Quick Step projects are installed by do-it-yourselfers, the majority of floors are installed by professional floating floor installers. Having your floor installed professionally offers many customers peace of mind. While most professional installers operate reputable businesses, are reliable and carry out all work in accordance with manufacturers’ instructions, it is always worth checking references before employing your installer.
If you need your Quick Step installed by a professional, simply contact your local Quick Step Retailer, details of which can be obtained in the Find a Retailer section of our Home Page.
Timber Flooring should not be installed in any area where moisture is likely to be a problem. Areas including bathrooms should not be installed with Quick-Step Timber flooring, nor should sauna’s. In the instance of laundries, Timber should not be installed in laundries where clothes dryers add steam or vapour to the room (when dryers are ducted into wall cavities, Quick-Step Timber is generally fit to be installed). Laundries with in-floor waste drains should not be installed using Timber flooring as subfloor levels are usually outside the tolerances of the Timber Installation Instructions, needing to drain to the waste. Obviously, Timber flooring should not be installed in external areas.
Timber is perfectly fit for installation in kitchens as liquid spills in these areas are wiped up or dried off very quickly.
If you have any further questions as to whether Quick-Step Timber flooring is suitable in a particular area of your home or business, feel free to contact your Retailer or local Floorscape Office for more information.